Nodebots Hardware (2018)
Date: 25 July 2025 | Posted by: AD-TEAM
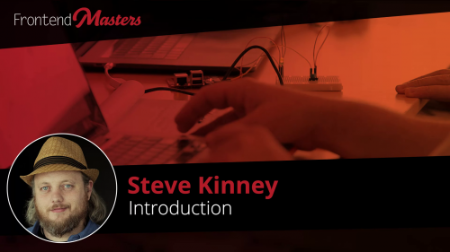
Nodebots Hardware (2018)
WEBRip | English | MP4 | 1920 x 1080 | VP8 ~661 kbps | 30 fps
A_VORBIS | 192 Kbps | 48.0 KHz | 2 channels | 2h 55min | 1.39 GB
Genre: Video Tutorial
In this course, Steve Kinney demonstrates how to use jаvascript to control hardware and IoT projects. Following along with the course, you will learn the fundamentals of electronics and how to work with microcontrollers.
Using the Johnny-Five library for Node.js, you will be able to make hardware interact with Web APIs, make LEDs light up from a web page, pull data in from third-party APIs, and read data from the world! _https://github.com/stevekinney/nodebots-workshop/tree/real-time-rgb-led
Table of Contents
Introduction
Introduction
00:00:00 - 00:06:21
Introduction
Steve Kinney provides an overview of the course, which is about building robots with Node.js. Steve reviews the hardware package needed for the course, Johnny-Five Inventor's Kit. - _https://www.sparkfun.com/products/14604
Setting Up the Tessel 2
00:06:22 - 00:20:11
Setting Up the Tessel 2
Steve walks students through setting up their Tessel 2 devices. He also takes a tour of the Johnny-Five Inventors Kit. - _https://tessel.io/start
Setup Debugging
00:20:12 - 00:21:28
Setup Debugging
Steve reviews how to resolve potential issues when working with multiple Tessel devices.
Tessel 2 LED
Getting an LED to Blink
00:21:29 - 00:25:48
Getting an LED to Blink
Steve walks through the Tessel 2 jаvascript library, demonstrating how to get a built-in LED to blink. - _https://github.com/stevekinney/nodebots-workshop/
Introducing Johnny-Five
00:25:49 - 00:27:52
Introducing Johnny-Five
Steve introduces Johnny-Five, an open source library that provides convenient abstractions for working with a wide variety of boards. - _http://johnny-five.io/
Wiring Up an LED
00:27:53 - 00:31:11
Wiring Up an LED
Steve wires a LED directly to the Tessel 2.
Controlling an LED with Johnny Five
00:31:12 - 00:36:56
Controlling an LED with Johnny Five
Steve writes code using Johnny Five to make the LED blink at a regular interval. - _https://github.com/stevekinney/nodebots-workshop/tree/button-with-led-solution
The Problem with LED Pulsing
00:36:57 - 00:41:28
The Problem with LED Pulsing
Steve explains what pulse width modulation (PWM) is and how digital devices use it to emulate analog signals. - _https://learn.sparkfun.com/tutorials/pulse-width-modulation
Breadboard Overview
00:41:29 - 00:45:30
Breadboard Overview
Steve explains how a breadboard works and why they are used when prototyping hardware. - _https://learn.sparkfun.com/tutorials/how-to-use-a-breadboard
Wiring Up an LED to the Breadboard
00:45:31 - 00:47:37
Wiring Up an LED to the Breadboard
After wiring up an LED using a breadboard, Steve makes it blink again and attempts unsuccessfully to make it pulse.
Pulsing LEDs
00:47:38 - 00:48:58
Pulsing LEDs
Steve uses port A7 to make the LED pulse successfully.
Buttons
Wiring Up a Button
00:48:59 - 00:54:13
Wiring Up a Button
Steve adds a button to the breadboard.
Programming the Button
00:54:14 - 00:59:15
Programming the Button
Steve gets events from the button programmatically. - _http://johnny-five.io/api/button/
Make the Button Control the LED
00:59:16 - 01:01:14
Make the Button Control the LED
Steve writes code to turn the LED on when the button is pressed and off when it is released.
RBG LEDs
Wiring Up a RGB LED
01:01:15 - 01:09:32
Wiring Up a RGB LED
Steve wires up an RGB LED to the breadboard.
Programming & Debugging RGB LED
01:09:33 - 01:17:44
Programming & Debugging RGB LED
Steve programs the RGB LED to rotate through red, green, and blue colors.
Controlling RGB LED from a Browser
01:17:45 - 01:26:33
Controlling RGB LED from a Browser
Steve writes an Express server and some client-side jаvascript to allow users to control the color of the LED.
Add WebSockets for Real-Time
01:26:34 - 01:37:54
Add WebSockets for Real-Time
Steve adds in Socket.io to allow for real-time control of the color of the RGB LED. - _https://github.com/stevekinney/nodebots-workshop/tree/real-time-rgb-led
Reading Weather Data
Wiring Up the BME280
01:37:55 - 01:42:14
Wiring Up the BME280
Steve wires up the BME280 weather sensor to the breadboard.
Reading the Weather Sensor
01:42:15 - 01:50:15
Reading the Weather Sensor
Steve writes jаvascript to log sensor readings to the console. - _https://github.com/stevekinney/nodebots-workshop/tree/bme280
Visualizing Sensor Data Using Barcli
01:50:16 - 01:59:03
Visualizing Sensor Data Using Barcli
Steve uses Lodash's throttle method and Barcli to visualize data in the terminal. - https://github.com/stevekinney/nodebots-workshop/tree/bme280-with-barcli
Update Web Page with Device Data Exercise
01:59:04 - 02:01:37
Update Web Page with Device Data Exercise
In this exercise, students create a page that displays real-time temperature data.
Update Web Page with Device Data Solution
02:01:38 - 02:09:21
Update Web Page with Device Data Solution
Steve walks through the solution to show how to code a page to display the current sensor readings in real-time via Socket.io.
Updating a Remote Server with Device Data
02:09:22 - 02:19:35
Updating a Remote Server with Device Data
Steve posts sensor readings to a remote server. - _https://github.com/stevekinney/nodebots-workshop/tree/bme280-with-sockets-and-post-requests
Magnetic Door Switch
Wiring Up a Magnetic Door Switch
02:19:36 - 02:22:39
Wiring Up a Magnetic Door Switch
Steve wires up a magnetic door switch to detect when a door or drawer has been opened.
Programming the Magnetic Door Switch
02:22:40 - 02:26:17
Programming the Magnetic Door Switch
Steve writes code to detect when a door has been opened.
Using Third-Party APIs with Hardware
02:26:18 - 02:39:31
Using Third-Party APIs with Hardware
Steve writes functionality to send him an email whenever a door has been opened with the SendGrid API. - _https://github.com/stevekinney/nodebots-workshop/tree/door-switch-with-sendgrid
Displaying Data with an LCD Screen
Wiring Up and LCD Screen
02:39:32 - 02:40:15
Wiring Up and LCD Screen
Steve wires up an LCD screen to the breadboard.
Programming the LCD Screen
02:40:16 - 02:45:08
Programming the LCD Screen
Steve create a web-based UI for updating the messages on the screen.
Showing Tweets on the LCD Screen
02:45:09 - 02:51:59
Showing Tweets on the LCD Screen
Steve pulls in a real-time Twitter stream and sends it to the LCD.
Other Kit Items & Wrap Up
02:52:00 - 02:56:09
Other Kit Items & Wrap Up
also You can watch my other last: Programming-posts
Screenshots
Exclusive eLearning Videos ← add to bookmarks

DDownload
https://ddownload.com/amy57twvta5i/yxusj.Nodebots.Hardware.part1.rar
https://ddownload.com/dmfjq7a9lzoq/yxusj.Nodebots.Hardware.part2.rar
RapidGator
https://rapidgator.net/file/bb4d59f0fd7d0be373d730b153080307/yxusj.Nodebots.Hardware.part1.rar
https://rapidgator.net/file/ae1b57a0825b04f752871bc07881af4b/yxusj.Nodebots.Hardware.part2.rar
NitroFlare
https://nitroflare.com/view/F8F1D1CD1D66C98/yxusj.Nodebots.Hardware.part1.rar
https://nitroflare.com/view/66D9E6B16CA42FE/yxusj.Nodebots.Hardware.part2.rar
See full article