Mastering Keyshot : Product Visualization - 3D Rendering
Date: 22 March 2023 | Posted by: oaxino

Mastering Keyshot : Product Visualization - 3D Rendering
Published 3/2023
MP4 | Video: h264, 1280x720 | Audio: AAC, 44.1 KHz
Language: English | Size: 1.90 GB | Duration: 1h 34m
Learn How to create photorealistic 3D Product Visualization using KeyShot - Beginner to Master Guide - 3D Rendering
Published 3/2023
MP4 | Video: h264, 1280x720 | Audio: AAC, 44.1 KHz
Language: English | Size: 1.90 GB | Duration: 1h 34m
Learn How to create photorealistic 3D Product Visualization using KeyShot - Beginner to Master Guide - 3D Rendering
What you'll learn
Learn how to use KeyShot to create Realistic Product Visualizations
3D Rendering Process Step by Step
Introduction to KeyShot
KeyShot User Interface
Import 3D Model
How to create Camera
How to create Lighting
How to create Materials
Lighting Presets
Render Settings Explanation
Final Render Settings
Final Renders Comparison
Introduction to Retouching in Adobe Photoshop
Extra Content: Depth of Field Renders
Extra Content: Close-up Renders
Extra Content: Bump Map vs Displacement Map
Requirements
No prior experience is needed. You will learn everything you need to know to create Product Visualizations in KeyShot
KeyShot 9 Pro or Newer Version to open files
Description
Introduction:Welcome to this course about 3D rendering in KeyShot. In this class, I will teach you how to create realistic product visualization in KeyShot. This tutorial contain step by step workflow, so if you are beginner you will be able to understand it and achieve same results. This tutorial is designed to teach you how to achieve realistic renders in high resolution. In this course I will explain and teach you how to render not only 1 render but 5 different renders. In the end of this course you will be able to understand fundamentals technique to product visualization.This course is for the beginners or someone new to 3D rendering. This course will show you how to create realistic product visualization in real life workflow and also show how you can apply this technique in your future renders.About This Course:In the beginning of this course, I will show you simple interface and how to navigate in KeyShot. I will explain how to set up photographic camera view and how to rotate 3D model to match reference images. We are going to apply simple materials to create lighting for our renders. In the lighting process I will show you and explain complete process how to create lighting in HDR editor from scratch. This HDR image can be used multiple times or you can export it and use it in different rendering engines. After we create lighting I will show you how to create master materials for this 3D model. We are going to replicate all the details from reference image. Most of these materials got seamless texture so you can save this materials into KeyShot Material Library and you can use it again for different 3D models and you save time when you will be texturing next 3D model. I will show you how to use KeyShot rendering settings for sharp images without noise and we are gonna compare final renders to see the results which render settings are the best. I am going to show you simple Post Production in Photoshop and give you tips and tricks how to create multiple color variations in post production.Extra Content:In the extra content I will explain difference between bump map and displacement map. I will teach you how to use Depth of Field to create even more realistic renders. In this content you can also find full explanation how to create close-up renders and how to set up lighting for these renders.What You Will Learn:1. KeyShot OverviewUser InterfaceImport 3D ModelMove 3D object Tool2. CameraKeyShot Camera - Move Object Tool and Camera View3. LightingCreating Custom LightingHDR Image Map OverviewPhysical Light vs HDR Image LightEnvironment SettingsLighting Presets4. MaterialsCreating Custom MaterialsLED Button MaterialTransparent Plastic ButtonsMaterial Label5. Depth of FieldDepth of Field IntroductionDepth of Field Camera and Render Settings6. Close-up RendersNew Close-up Camera ViewNew Close-up HDR Image Lighting7. RenderingRender Settings ExplanationFinal Render SettingsCustom Controls vs Maximum SamplesFinal Renders Comparison8. RetouchingIntroduction to Retouching in Adobe PhotoshopTips and TricksProject Files:FBX 3D ModelOBJ 3D ModelKeyShot ScenesAdobe Photoshop FilesTexturesSoftware Used:KeyShot 9 Pro, Adobe Photoshop CC 2020
Overview
Section 1: Introduction - Mastering KeyShot
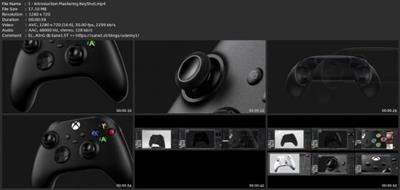
Lecture 1 Introduction - Mastering KeyShot
Lecture 2 KeyShot Overview - Import 3D model
Lecture 3 KeyShot Overview - User Interface
Section 2: KeyShot Camera
Lecture 4 KeyShot Camera - Move Object Tool and Camera View
Section 3: KeyShot Lighting
Lecture 5 KeyShot Lighting - Physical Light vs HDR Image Light
Lecture 6 KeyShot Lighting - Environment Settings
Lecture 7 KeyShot Lighting - HDR Image Map Overview
Lecture 8 KeyShot Lighting - Create HDR Image Light
Lecture 9 KeyShot Lighting - Lighting Presets
Section 4: KeyShot Materials
Lecture 10 KeyShot Materials - Main Plastic Material
Lecture 11 KeyShot Materials - Joystick Material
Lecture 12 KeyShot Materials – LED Button Material
Lecture 13 KeyShot Materials – Transparent Plastic Buttons
Lecture 14 KeyShot Materials – Material Label
Lecture 15 KeyShot Materials – Soft Plastic Buttons
Lecture 16 KeyShot Materials - Trigger Button - Combine Two Bump Maps
Lecture 17 KeyShot Materials – USB Type C Materials
Lecture 18 KeyShot Materials – Split Surface for Materials
Lecture 19 KeyShot Materials – Finishing Materials
Section 5: KeyShot Tips and Tricks
Lecture 20 KeyShot Tips and Tricks – Light and Materials
Section 6: KeyShot Rendering
Lecture 21 KeyShot Rendering – Final Adjustments
Lecture 22 KeyShot Rendering – Render Settings Explanation
Lecture 23 KeyShot Rendering – Final Render Settings
Lecture 24 KeyShot Rendering – Custom Controls vs Maximum Samples
Lecture 25 KeyShot Rendering – Final Correction
Lecture 26 KeyShot Rendering – Final Renders Comparison
Section 7: Photoshop Retouching
Lecture 27 Photoshop Retouching – Introduction to Retouching
Lecture 28 Photoshop Retouching – Tips and Tricks
Section 8: Extra Content
Lecture 29 Extra Content – Second Camera Angle Overview
Lecture 30 Extra Content – Second HDR Image Lighting
Lecture 31 Extra Content – Final Adjustments and Render Settings
Lecture 32 Extra Content – Depth of Field Introduction
Lecture 33 Extra Content – Depth of Field Camera and Render Settings
Lecture 34 Extra Content – New Depth of Field Camera View
Lecture 35 Extra Content – New HDR Image Lighting
Lecture 36 Extra Content – Finishing Depth of Field and Render Settings
Lecture 37 Extra Content – Bump Map vs Displacement Map
Lecture 38 Extra Content – New Close-up Camera View
Lecture 39 Extra Content – New Close-up HDR Image Lighting
Lecture 40 Extra Content – Finishing Depth of Field Camera View
Section 9: Outro - Final Renders
Lecture 41 Outro - Final Renders
This course is for Beginners,This course is for New 3D Artist,Anyone who wants to learn how to create Realistic Product Visualization in KeyShot
Download link
rapidgator.net:
https://rapidgator.net/file/0ef384a15cbc1ee0f273773f2cd89d89/pcyci.Mastering.Keyshot..Product.Visualization..3D.Rendering.part1.rar.html
https://rapidgator.net/file/ddb1b91d86b1dfda3f344f5da8d3a7d3/pcyci.Mastering.Keyshot..Product.Visualization..3D.Rendering.part2.rar.html
uploadgig.com:
https://uploadgig.com/file/download/9eD845099e7988A4/pcyci.Mastering.Keyshot..Product.Visualization..3D.Rendering.part1.rar
https://uploadgig.com/file/download/D161018d8cF3e9e9/pcyci.Mastering.Keyshot..Product.Visualization..3D.Rendering.part2.rar
nitroflare.com:
https://nitroflare.com/view/EF37DCC33DADCDF/pcyci.Mastering.Keyshot..Product.Visualization..3D.Rendering.part1.rar
https://nitroflare.com/view/DEDC560136E1939/pcyci.Mastering.Keyshot..Product.Visualization..3D.Rendering.part2.rar
1dl.net:
https://1dl.net/p54pbefbrl1j/pcyci.Mastering.Keyshot..Product.Visualization..3D.Rendering.part1.rar
https://1dl.net/za3qkq69f3gr/pcyci.Mastering.Keyshot..Product.Visualization..3D.Rendering.part2.rar
See full article